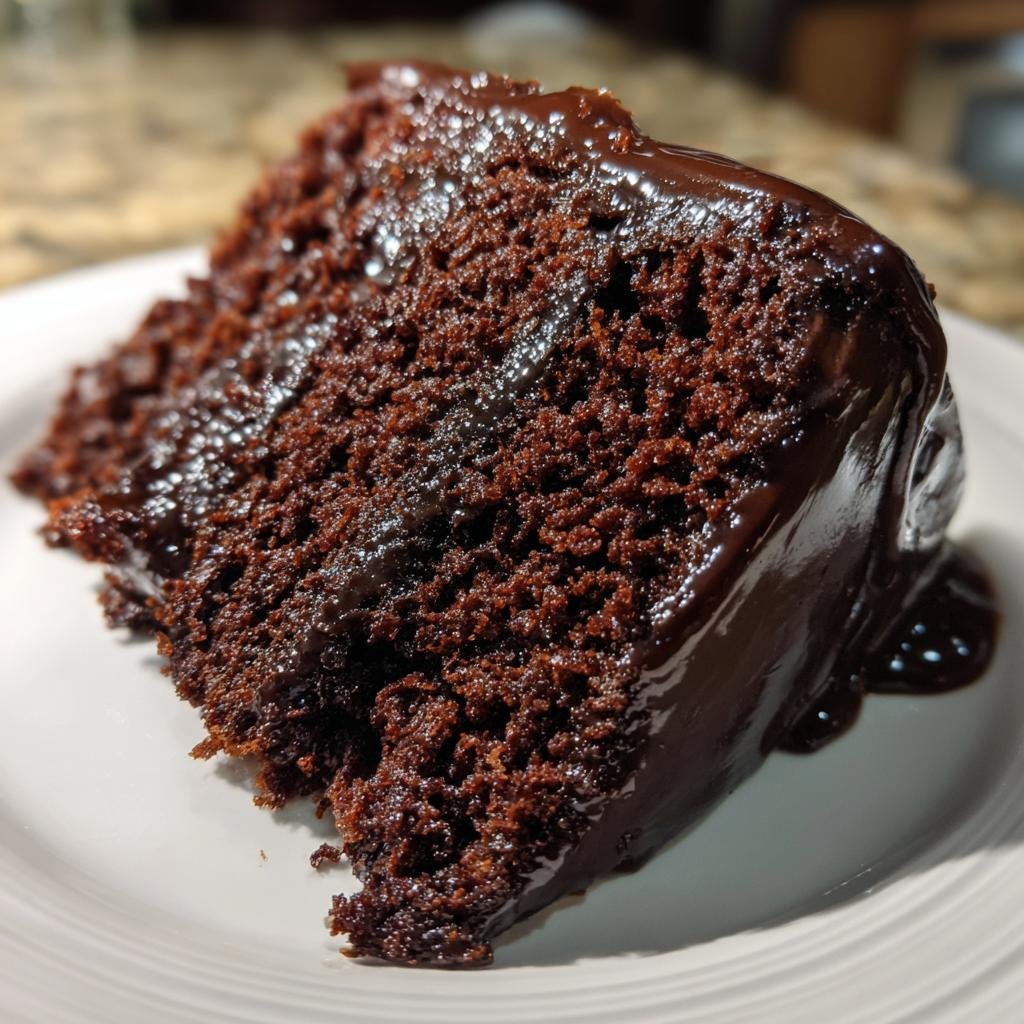
There’s something magical about Thanksgiving desserts, isn’t there? The moment the turkey’s cleared, everyone starts eyeing the sweet treats—and in my house, that means chocolate, chocolate, and more chocolate. I’ve been making these rich, fudgy chocolate desserts for Thanksgiving since my kids were little, and let me tell you, they disappear faster than the mashed potatoes!
My grandmother used to say, “Life’s too short for bad chocolate,” and I took that to heart. Every November, I pull out her old mixing bowls and whip up these decadent chocolate desserts that feel like a warm hug after a big meal. The secret? Using real cocoa powder (none of that instant stuff!) and a pinch of love. Whether you’re serving a crowd or just indulging yourself, these chocolatey bites are the perfect way to end your Thanksgiving feast.

Why You’ll Love These Thanksgiving Chocolate Desserts
Trust me, once you try these, they’ll become your new holiday tradition. Here’s why:
- Rich, fudgy perfection: That deep chocolate flavor? It’s like a cozy blanket for your taste buds—totally worth skipping the pumpkin pie for.
- Foolproof baking: Even if you burn toast regularly (no judgment!), this recipe is forgiving. Just mix, bake, and bask in the compliments.
- Holiday magic: The smell alone—warm cocoa and vanilla—will have your guests hovering near the kitchen. Pro tip: Bake an extra batch for “testing” before the big day.
Ingredients for Thanksgiving Chocolate Desserts
Grab your favorite mixing bowl—here’s what you’ll need to make these chocolatey wonders:
- 2 cups all-purpose flour (or switch to gluten-free 1:1 baking blend if needed)
- 1 cup cocoa powder – splurge on the good stuff, it makes all the difference
- 1 cup granulated sugar (pack it lightly when measuring)
- 1/2 cup butter, softened – I leave mine out overnight for perfect creaming
- 2 large eggs at room temperature (cold eggs make the batter grumpy)
- 1 tsp vanilla extract – the real deal, not imitation
- 1/2 tsp salt to balance the sweetness
- 1 tsp baking powder for that perfect rise
See? Nothing fancy—just simple, honest ingredients that turn into pure holiday magic.
Equipment You’ll Need
Don’t worry—you won’t need any fancy gadgets for this one! Here’s what I always grab from my kitchen:
- A trusty mixing bowl (the bigger, the better—less mess!)
- 9×9-inch baking pan or your favorite cake tin
- Measuring cups and spoons—no eyeballing the cocoa!
- A wooden spoon or spatula for stirring (my grandma swore by hers)
- Whisk for blending dry ingredients
That’s it! Now let’s get baking.
How to Make Thanksgiving Chocolate Desserts
Alright, let’s get to the fun part—turning those simple ingredients into chocolate heaven! This is where the magic happens, and I promise, it’s easier than convincing your uncle to take seconds (which he definitely will). Follow these steps, and you’ll have the star of your dessert table in no time.
Step 1: Prepare the Dry Ingredients
First things first—preheat that oven to 350°F (175°C). Trust me, you don’t want to realize it’s cold after your batter’s ready! Now, grab your biggest mixing bowl and whisk together:
- 2 cups all-purpose flour
- 1 cup cocoa powder (sift it if it’s lumpy—no one wants chocolate clumps!)
- 1 tsp baking powder
- 1/2 tsp salt
Whisk until it looks like a rich, chocolaty sand. Take a whiff—that’s the smell of success already.
Step 2: Combine Wet Ingredients
In another bowl, let’s get creamy! Beat the 1/2 cup softened butter with 1 cup sugar until it’s fluffy and pale—about 2 minutes with a mixer, or 3-4 minutes by hand (good arm workout!). Then, add:
- 2 eggs (one at a time, mixing well after each)
- 1 tsp vanilla extract
Now, gently fold the wet mixture into the dry ingredients. Don’t overmix—just until no flour streaks remain. The batter will be thick and fudgy, like brownie batter. (Resist the urge to eat it raw… or don’t. I won’t tell.)
Step 3: Bake to Perfection
Pour the batter into your greased pan and smooth the top. Slide it into the oven and set a timer for 30 minutes. Around the 25-minute mark, do the toothpick test—stick it in the center. If it comes out with a few moist crumbs, you’re golden. If it’s wet, give it another 3-5 minutes.
Once done, let it cool completely in the pan (this is the hardest part—I know!). Cutting warm cake is like trying to herd cats at Thanksgiving: messy and slightly disastrous. Patience pays off with clean slices!
Tips for the Best Thanksgiving Chocolate Desserts
Want to take your chocolate desserts from good to “Can I get your recipe?” level? Here are my tried-and-true secrets:
- Splurge on quality cocoa: That grocery store brand won’t cut it! Look for Dutch-processed cocoa—it gives that deep, rich chocolate flavor we all crave.
- Room temp is key: Cold butter and eggs make for a lumpy batter. I leave mine out overnight—your mixing arm will thank you.
- Don’t skimp on cooling time: I know it’s tempting, but cutting too soon leads to crumbly messes. Let it rest until the pan feels just warm to the touch.
- Store like a pro: Keep leftovers (ha!) in an airtight container with a slice of bread on top. The bread gets stale while the cake stays fresh—magic!
Follow these, and you’ll be the Thanksgiving dessert hero every year.
Variations for Your Thanksgiving Chocolate Desserts
Want to mix things up? Here are my favorite ways to jazz up this classic:
- Nutty delight: Fold in 1 cup chopped walnuts or pecans for crunch
- Peppermint twist: Add 1 tsp peppermint extract for festive flavor
- Chocolate chip upgrade: Stir in 1/2 cup mini chocolate chips (because more chocolate is always better!)
- Orange zest magic: Grate in 1 tbsp orange zest for bright holiday flavor
Trust me – these little tweaks make each bite extra special!
Serving Suggestions
Oh, the possibilities! I love serving these warm with a scoop of vanilla ice cream melting over the top – it’s like a chocolate hug for your spoon. For holiday flair, dust with powdered sugar or drizzle with caramel sauce. Fancy? Yes. Easy? Absolutely. Your guests will think you slaved for hours!
Storing and Reheating Thanksgiving Chocolate Desserts
Here’s how to keep your chocolatey masterpiece tasting fresh (if it lasts that long!): Store cooled leftovers in an airtight container at room temperature for up to 3 days—just tuck a slice of bread on top to prevent drying. For longer storage, freeze slices wrapped in plastic for 2 months. To reheat, pop a slice in the microwave for 10-15 seconds until just warm—it’ll taste freshly baked all over again!
Thanksgiving Chocolate Desserts FAQs
Got questions? I’ve got answers! Here are the things people ask me most about these chocolatey Thanksgiving treats:
Can I freeze this dessert?
Absolutely! Wrap cooled slices tightly in plastic wrap, then foil, and freeze for up to 2 months. Thaw at room temperature when those chocolate cravings hit—it tastes just as good as fresh!
Can I make this gluten-free?
You bet! Swap the all-purpose flour for your favorite 1:1 gluten-free baking blend. My niece does this every year, and no one can tell the difference (except her happy tummy!).
Why did my cake turn out dry?
Two likely culprits: overbaking or old baking powder. Set that timer religiously, and check your leavener’s expiration date. And remember—moist crumbs on the toothpick mean it’s done, not clean!
Can I use melted butter instead of softened?
Technically yes, but the texture won’t be as light. Creaming softened butter with sugar creates air pockets that make the cake tender. Worth the wait—promise!
How do I make this extra festive?
Try topping with crushed candy canes for Christmas, or arrange fresh raspberries in a turkey shape for Thanksgiving. Food coloring in the glaze makes fun holiday hues too!
Nutritional Information
Just so you know what you’re indulging in (no judgment here!), here’s the scoop per serving: about 250 calories, with 20g sugar and 10g fat. These are estimates—actual values may vary based on your ingredients. Remember, it’s Thanksgiving… calories don’t count when they’re this delicious! Now go ahead—slice, serve, and savor every chocolaty bite.
Made this recipe? Share your chocolatey masterpiece in the comments below—I’d love to see your Thanksgiving creations!
Print
Irresistible Thanksgiving Chocolate Desserts in 30 Minutes
- Total Time: 45 minutes
- Yield: 12 servings 1x
- Diet: Vegetarian
Description
Delicious chocolate desserts perfect for Thanksgiving.
Ingredients
- 2 cups all-purpose flour
- 1 cup cocoa powder
- 1 cup sugar
- 1/2 cup butter
- 2 eggs
- 1 tsp vanilla extract
- 1/2 tsp salt
- 1 tsp baking powder
Instructions
- Preheat oven to 350°F.
- Mix dry ingredients in a bowl.
- Add wet ingredients and mix well.
- Pour batter into a greased pan.
- Bake for 30 minutes.
- Let cool before serving.
Notes
- Use high-quality cocoa for best results.
- Check doneness with a toothpick.
- Store in an airtight container.
- Prep Time: 15 minutes
- Cook Time: 30 minutes
- Category: Dessert
- Method: Baking
- Cuisine: American
Nutrition
- Serving Size: 1 slice
- Calories: 250
- Sugar: 20g
- Sodium: 150mg
- Fat: 10g
- Saturated Fat: 6g
- Unsaturated Fat: 3g
- Trans Fat: 0g
- Carbohydrates: 35g
- Fiber: 2g
- Protein: 4g
- Cholesterol: 40mg
Keywords: thanksgiving chocolate desserts, chocolate cake, holiday treats
