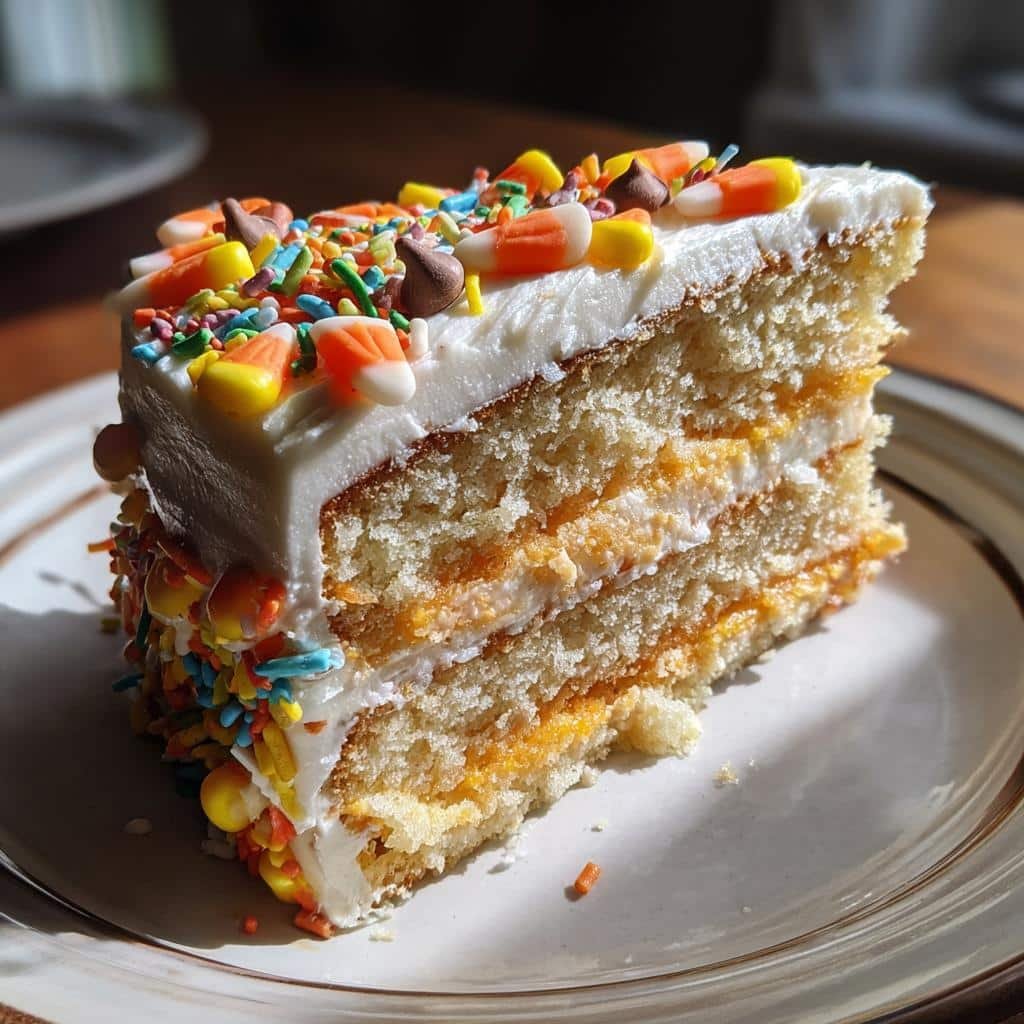
You know that moment when you realize Thanksgiving is tomorrow and you forgot to plan a dessert? Yeah, me too. That’s exactly why I fell in love with this ridiculously easy thanksgiving cake decorating idea—it’s my go-to rescue when I need something festive fast. No fancy skills required, just a pre-made cake, some colorful frosting, and whatever fall candies I can dig out of the pantry. Even my 6-year-old can help (and trust me, she does—usually while sneaking more candy corn than she decorates with). It’s the perfect way to add a little homemade charm to your table without stressing over perfection. Let’s make a mess and some memories, shall we?
Why You’ll Love This Easy Thanksgiving Cake Decorating
Let me count the ways this cake decorating hack will save your holiday sanity:
- No baking required – Start with a store-bought cake and skip the oven altogether (because who has time when the turkey’s hogging it?)
- Kid-friendly fun – Little hands can smear frosting and toss sprinkles without ruining your masterpiece (just embrace the chaos!)
- Instant holiday vibes – Candy corn and chocolate chips transform any cake into a festive centerpiece in minutes
- Zero fancy skills needed – My “turkey” decorations usually look more like colorful blobs, and guess what? Everyone still gobbles them up
It’s the dessert equivalent of a cozy flannel shirt – comforting, unpretentious, and always welcome at the Thanksgiving table.
Ingredients for Easy Thanksgiving Cake Decorating
Here’s the beautiful part – you probably have most of this already in your pantry! The magic of this cake is how ordinary ingredients become something special with just a little creativity. Here’s what you’ll need:
- 1 pre-made cake (any flavor, fully cooled) – Store-bought is totally fine (I won’t tell!), or use your favorite homemade recipe. Just make sure it’s completely cool – frosting a warm cake is a mess waiting to happen!
- 2 cups vanilla frosting, divided – I always keep a couple cans of store-bought frosting on hand for emergencies, but homemade works too if you’re feeling fancy.
- Food coloring (brown, orange, yellow, red) – The little gel food coloring kits are perfect for this. Pro tip: Brown makes all the fall colors look richer and more natural.
- 1 cup candy corn – These are the ultimate Thanksgiving decorating hack. They make perfect “turkey feathers” or fall leaves in a pinch!
- 1/2 cup chocolate chips – Use these for eyes, turkey beaks, or just scattered decor. Semi-sweet works best for contrast against the bright frosting.
- 1/4 cup sprinkles (fall colors) – Those mixed autumn sprinkles you see everywhere? Grab a bottle – they add instant holiday cheer with zero effort.
See? Nothing complicated here. The best part is you can swap out almost any of these – no candy corn? Use M&Ms. No sprinkles? Crushed graham crackers make great “dirt” for a harvest theme. This is supposed to be fun, not stressful!
Equipment You’ll Need
Here’s the good news – you don’t need fancy tools to make a showstopping Thanksgiving cake! Half of this stuff is probably already in your kitchen junk drawer (you know, the one with mismatched measuring cups and that weird plastic spatula from 2012). Here’s what I grab:
- A few small bowls – For dividing and coloring your frosting. I’ve used coffee mugs in a pinch!
- Spoons or butter knives – Perfect for spreading frosting if piping feels too intimidating. My personal hack? An old credit card makes a great frosting smoother.
- Piping bags or plastic bags – Don’t own piping bags? No problem! A ziplock with the corner snipped off works just as well for simple designs.
- Toothpicks – These are my secret weapon for swirling colors and fixing little mistakes (and let’s be real, there will be mistakes).
That’s it – seriously! Though if you want to get fancy, a turntable makes decorating easier, and offset spatulas give you smoother frosting. But for our purposes today? A spoon and some enthusiasm will get you further than you’d think.
Step-by-Step Thanksgiving Cake Decorating Instructions
Alright, let’s get into the fun part! I promise this is easier than herding relatives at Thanksgiving dinner. Just follow these simple steps, and you’ll have a cake that looks like you spent hours on it (when really, you were probably watching the parade in your pajamas).
Step 1: Prepare the Cake Base
First things first – if you baked your cake, let it cool completely. I mean completely. Touch the bottom of the pan – if it’s even slightly warm, walk away and have another cup of coffee. Frosting a warm cake is like putting lipstick on a toddler – messy and destined for disaster.
Using a store-bought cake? Perfect! Just unwrap it and give it a quick once-over. If the top’s uneven, you can level it with a serrated knife, but honestly? I usually skip this step because a little character never hurt anyone.
Step 2: Color the Frosting
Now for the colorful magic! Divide your frosting into small bowls – I usually do about 1/2 cup portions. Start with just a tiny drop of food coloring (those gel colors are potent!) and mix well before adding more. For fall colors:
- Orange: Equal parts red and yellow
- Rust: More red than yellow with a tiny touch of brown
- Gold: Yellow with a speck of brown
- Deep red: Red with a drop of brown (trust me, this makes it look more autumnal)
Cover any bowls you’re not using immediately with a damp paper towel – frosting crusts over faster than you’d think!
Step 3: Frost and Decorate
Time to get creative! Start with a thin “crumb coat” of plain white or light brown frosting over the entire cake (this keeps crumbs from showing through). No piping skills? No problem! Here’s my foolproof method:
- Leaves: Use a spoon to dollop colored frosting, then drag a toothpick through to make leaf veins
- Turkey bodies: A brown frosting blob with candy corn feathers fanned out behind it
- Pumpkins: Orange frosting dots with a chocolate chip stem
Remember – abstract is totally fine! My “turkeys” often look more like psychedelic chickens, and everyone still thinks they’re adorable.
Step 4: Add Finishing Touches
This is where the cake really comes to life! Scatter candy corn around the edges like a festive border. Press chocolate chips into frosting for eyes or acorns. Shake sprinkles over everything – let the kids go wild with this part!
Final pro tip: step back and look at your cake from all angles before declaring it done. Sometimes one last candy corn in just the right spot makes all the difference. Then set it aside (out of reach of sneaky fingers!) to let the frosting set for about 30 minutes before serving.

Tips for Perfect Thanksgiving Cake Decorating
After decorating more lopsided turkeys and abstract “fall foliage” than I can count, I’ve picked up some foolproof tricks to make your cake look like you actually know what you’re doing (even when you don’t). Here are my biggest aha moments:
Chill your frosting between colors – That bowl of orange frosting turning your leaves into blobs? Pop it in the fridge for 10 minutes. Cooler frosting holds its shape way better when piping or spreading. I’ve rescued many a melting turkey this way!
Keep a cup of hot water handy – Dip your knife or spatula in it before smoothing frosting – the warmth makes magic happen. Suddenly your rough edges become bakery-perfect (well, bakery-adjacent at least).
Let kids decorate the sides first – Their “artistic interpretations” look charming around the base, leaving you the top for slightly more controlled designs. Plus, little fingers can’t reach the middle as easily when you’re not looking.
Toothpicks are your secret weapon – Draw light guidelines in the frosting before piping, or use them to blend colors for marbled effects. I once “fixed” a complete frosting disaster by swirling it into a gorgeous sunset design.
Embrace the rustic look – Uneven edges? Call it “homemade charm.” Colors bled together? It’s “abstract art.” I’ve served cakes that looked like a preschool art project, and you know what? People remember the fun more than the flaws.
Variations for Your Thanksgiving Cake
Oh, the possibilities! Once you’ve mastered the basics, here are some fun twists to keep your Thanksgiving dessert fresh year after year:
Switch up the toppings – Candy corn not your thing? Try:
- Peanut butter cups as pumpkin bases
- Pretzel sticks for turkey legs or fence posts
- Dried cranberries scattered like fall leaves
Go nuts with textures – Crushed pecans or walnuts make amazing “dirt” or tree bark. Toast them first for extra flavor!
Fondant for the brave – Store-bought fondant can create smooth pumpkins or detailed leaves. Just knead in a bit of food coloring and roll it thin.
Mini cake forest – Bake cupcakes instead and decorate each as a different fall motif – instant portion control and variety!
The best part? There are no rules. Last year my niece insisted we add gummy worms “for the turkeys to eat.” Was it traditional? Nope. Memorable? Absolutely.
Serving and Storing Your Decorated Cake
Here’s the beautiful thing about this cake – it’s as low-maintenance as it is easy to make! After all that decorating fun, you’ll want to keep your masterpiece looking its best until showtime. Here’s what I’ve learned through trial and error (mostly error):
Room temperature is your friend – Unless your kitchen is sweltering, this cake happily sits out for 2-3 days. The frosting acts like a protective seal. Just tent it loosely with foil to keep dust (and curious fingers) off. That said, if you used fresh fruit or whipped cream frosting (not that I ever have – too ambitious for me!), then fridge it is.
Fridge storage tricks – Need to make it ahead? Pop it in the fridge, but first let the frosting set completely at room temp (about an hour). Cover with a cake dome or overturned bowl – never plastic wrap unless you enjoy redecorating smushed frosting. Cold frosting gets firm, so take it out 30 minutes before serving to let it soften up.
Serving like a pro – Use a sharp knife dipped in hot water between slices for clean cuts. Wipe it dry first though – nobody wants watery frosting! If your decorations are lopsided (hey, it happens), just rotate the cake so the “good side” faces the table. I always put the most photogenic slice on my mom’s plate first – she’s my best advertiser!
Leftover magic – Stale cake? Crumble it into parfait glasses with pudding and whipped cream for an instant trifle. Or toast slices lightly and serve with ice cream – suddenly it’s a whole new dessert!
Thanksgiving Cake Decorating FAQs
Over the years, I’ve gotten all sorts of questions about this cake – usually while covered in frosting and trying to salvage a lopsided turkey decoration. Here are the answers to the ones that come up most often:
Can I use buttercream instead of vanilla frosting?
Absolutely! Buttercream pipes beautifully and tastes delicious – just know it crusts faster than canned frosting, so work quickly. My cheat? Thin it with a teaspoon of milk if it gets too stiff. And if you’re feeling fancy, add a dash of cinnamon or pumpkin spice to the buttercream for extra fall flavor.
How far in advance can I decorate the cake?
The sweet spot is 1-2 days before serving. Any longer and your candy decorations might start to bleed color (learned that the hard way with a pink-streaked turkey last year). If you need to prep earlier, decorate just the base layer and add fresh toppings the day of.
Help! My frosting colors look neon instead of autumnal!
Been there! The trick is adding a tiny bit of brown food coloring to mute bright shades. Start with just a toothpick dip – it’s amazing how a touch of brown turns electric orange into perfect pumpkin spice vibes.
Can I freeze the decorated cake?
Technically yes, but I don’t recommend it. The texture changes, and thawing often causes condensation that ruins your decorations. Instead, freeze the undecorated cake layers wrapped tightly in plastic, then thaw and decorate fresh.
What’s the easiest design for total beginners?
My foolproof starter design: Cover the whole cake in orange frosting, add a ring of candy corn around the bottom edge, and scatter chocolate chips randomly on top. Call it “harvest confetti” – looks intentional, takes 5 minutes, and kids love it!
Nutritional Information
Okay, let’s be real – we’re not exactly making health food here, but that’s what Thanksgiving is for, right? Just remember these numbers are rough estimates (because who actually measures how many sprinkles their kid dumped on?). A typical slice will run you about 250 calories, with most coming from that delicious frosting and candy topping combo. The exact numbers will vary wildly depending on your frosting brand, how heavy-handed you are with decorations, and whether you “accidentally” sampled half the candy corn beforehand (no judgment!).
If you’re watching sugar intake, try reducing the frosting layer thickness or using darker chocolate chips for less sweetness. But honestly? It’s one day a year – save the kale for January and enjoy every crumb of this festive treat with your loved ones!
Share Your Creation!
Okay, I know your cake turned out adorable – now I want to see it! There’s nothing more fun than swapping Thanksgiving cake fails and triumphs (and trust me, I’ve had plenty of both). Snap a pic before it gets devoured and share it in the comments – lopsided turkeys and abstract “fall foliage” welcome! Did your kids go wild with the sprinkles? Did your attempt at piping leaves turn into modern art? That’s the best part!
And hey, if you came up with an amazing new hack or discovered the perfect candy corn alternative, spill your secrets below. We’re all in this delicious mess together. Can’t wait to see what you whipped up – imperfections and all!
Print
Easy Thanksgiving Cake Decorating in Just 4 Simple Steps
- Total Time: 20 minutes
- Yield: 1 cake (serves 8-10) 1x
- Diet: Vegetarian
Description
A simple and easy cake decorating idea for Thanksgiving. Perfect for beginners and fun for the whole family.
Ingredients
- 1 pre-made cake (any flavor)
- 2 cups vanilla frosting
- Food coloring (brown, orange, yellow, red)
- 1 cup candy corn
- 1/2 cup chocolate chips
- 1/4 cup sprinkles (fall colors)
Instructions
- Bake or buy a pre-made cake and let it cool completely.
- Divide the vanilla frosting into small bowls and color each with food coloring to create fall shades.
- Frost the cake with a thin base layer of white or light brown frosting.
- Use a piping bag or spoon to decorate the cake with autumn leaves, pumpkins, or turkey designs.
- Add candy corn, chocolate chips, and sprinkles for extra texture and detail.
- Let the frosting set before serving.
Notes
- Use store-bought frosting to save time.
- Involve kids for a fun family activity.
- Keep decorations simple for an easy yet festive look.
- Prep Time: 20 minutes
- Cook Time: 0 minutes (if using pre-made cake)
- Category: Dessert
- Method: No-bake decorating
- Cuisine: American
Nutrition
- Serving Size: 1 slice
- Calories: 250
- Sugar: 20g
- Sodium: 150mg
- Fat: 10g
- Saturated Fat: 4g
- Unsaturated Fat: 5g
- Trans Fat: 0g
- Carbohydrates: 35g
- Fiber: 1g
- Protein: 2g
- Cholesterol: 5mg
Keywords: thanksgiving cake, easy cake decorating, fall dessert, family activity
